
Product page setup
Add the financing message to your product pages — with the Nelo app, your theme, or a CMS template.
This page adds Nelo's financing message to your product pages: first load the widget, then place the message where you want it. If you do not know your storefront type, check "Before you start" on Improve conversion in Vtex.
Store Framework — install the app (recommended)
vtex login <account>
vtex use master
vtex install nelomx.nelo-bnpl-messaging
Then open Admin → Apps → Nelo BNPL Promotional Messaging → Settings, paste your publishable key, and save. The app does nothing until the key is set.
App settings in Vtex are scoped to the workspace you save them on. A key saved on a test workspace does not reach production until you promote it, and vice versa — if messaging works on one URL but not another, check the key in that URL's admin first.
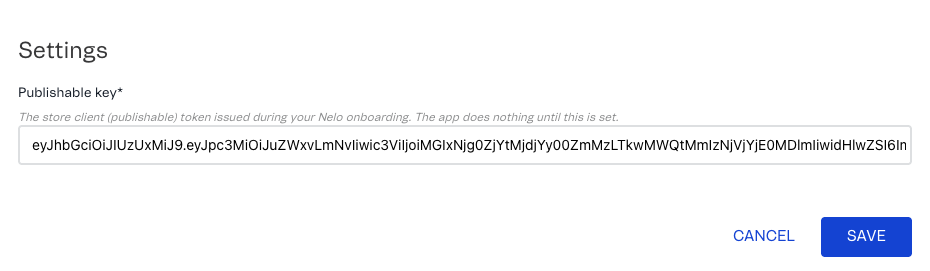
publishable key on extension settings
To test on a workspace before production, run vtex use nelotest (answer y to create it) instead of vtex use master, and validate on https://nelotest--<account>.myvtex.com.
Store Framework — without the app
If you prefer not to install the app, add a loader component to your theme. Create react/NeloLoader.js:
import { useEffect } from 'react'

const NeloLoader = ({ publishableKey }) => {
  useEffect(() => {
    if (!publishableKey || window._neloConfig) return
    window._neloConfig = { publishableKey }
    if (!document.querySelector('script[src*="js.nelo.co"]')) {
      const s = document.createElement('script')
      s.src = 'https://js.nelo.co/platform/vtex.js'
      s.defer = true
      document.head.appendChild(s)
    }
  }, [publishableKey])
  return null
}

export default NeloLoader
Declare it in store/interfaces.json:
{
  "nelo-loader": { "component": "NeloLoader" }
}
And add it to store.product's children with your key (it renders nothing, so position does not matter):
"nelo-loader": {
  "props": { "publishableKey": "YOUR_PUBLISHABLE_KEY" }
}
Legacy CMS portal
Open Admin → Storefront → Layout → CMS → HTML Templates, open your product template, and paste at the top. The CMS editor validates XHTML, so defer needs a value:
<script>
  window._neloConfig = { publishableKey: 'YOUR_PUBLISHABLE_KEY' };
</script>
<script src="https://js.nelo.co/platform/vtex.js" defer="defer"></script>
Then add the message where you want it, next to the price or the add-to-cart controls:
<div class="nelo-as-low-as"></div>This div is the placement, and it is required on legacy storefronts — the automatic fallback described below is available on Store Framework only. If some products use other templates (Product-clean, Product-QuickView), add the div in each.
Legacy template edits are account-wide and take effect on production as soon as you save.
Where the message appears
You decide. Place the nelo-as-low-as block where you want the message, and it renders there and only there.
Add the dependency to your theme's manifest.json:
"nelomx.nelo-bnpl-messaging": "1.x"Then add "nelo-as-low-as" to the children array right after your price block — usually in store/blocks/product/product.jsonc:
"children": [
  "product-price#pdp",
  "nelo-as-low-as"
]
No props or data attributes are needed: the widget resolves the price itself and follows SKU selection.
If you are not using the app, create the block as a theme component instead — react/NeloAsLowAs.js returning <div className="nelo-as-low-as" />, declared in store/interfaces.json as "nelo-as-low-as": { "component": "NeloAsLowAs" } — and place it the same way.
If you cannot edit your theme
Some stores do not have access to their theme source. In that case the widget places the message on its own, in the column that holds the add-to-cart button: it renders at the end of that column, then moves up to the first position under the add-to-cart section once the page settles. On some themes it stays at the end, to avoid taking a position another widget on the page is about to use.
This is a fallback, not the default. As soon as you place the block, it takes over and nothing moves.
Ship it
Test workspace: run vtex link in the theme repo and validate on the workspace URL. The block live-reloads, so you can move it and re-check.
Production: release the theme as usual — vtex publish, then vtex deploy (allowed 7 minutes after publish), then install the new version on master. Note that vtex promote applies only to production workspaces and never carries linked apps.
Updated about 2 months ago